1. 安装Node.js
- 下载:https://nodejs.org/en/download/ (官网,建议选择LTS版本)
- 安装:一路next
2. 安装、配置Git
2.1. 安装Git
- 下载:https://git-scm.com/downloads
- 安装:一路next
2.2. 配置Git
2.2.1. 注册Github账号
2.2.2. 设置用户名和用户邮箱
设置用户名
1
git config --global user.name "用户名" # github用户名,非昵称
设置用户邮箱
1
git config --global user.email "邮箱" # 填写你的github注册邮箱
2.2.3. 生成SSH key
鼠标的右键,选择 Git Bash Here
输入 命令,一路回车。 (email是你在github上注册的email)
1
ssh-keygen -t rsa -C "邮箱"
2.2.4. github配置SSH key
找到.ssh\id_rsa.pub文件,打开并复制里面的内容
打开你的github主页,进入Setting -> SSH and GPG keys -> New SSH key:
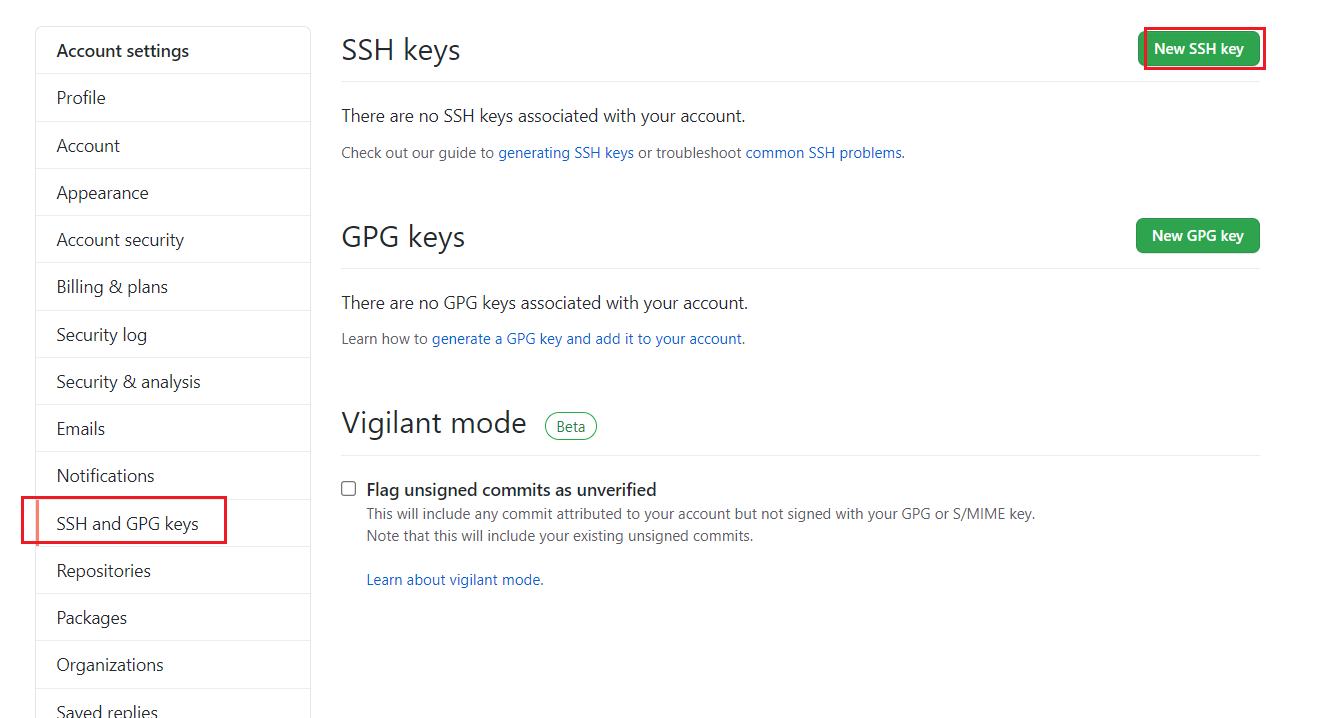
将刚复制的内容粘贴到key那里,title随便填,保存。
3. 安装Hexo
3.1. 安装node 与 npm
检测node 与 npm是否安装成功
1 | node -v |
3.2. npm加速
如果网络很慢,npm使用国内镜像,解决卡顿,或者安装cnpm提高速度,以后下载东西都用cnpm
npm/cnpm:节点包管理器是NodeJS的包管理器,用于节点插件管理(包括安装,卸载,管理依赖等)
换成阿里源
1
npm config set registry https://registry.npm.taobao.org
验证命令
1
npm config get registry # 返回https://registry.npm.taobao.org,说明镜像配置成功。
安装cnpm
1
npm install -g cnpm --registry=https://registry.npm.taobao.org
检测cnpm下载成功
1
cnpm -v
3.3. 正式安装hexo
1 | npm(或者cnpm) install -g hexo-cli # 安装hexo |
检测hexo 是否安装成功
1 | hexo -v |
4. 使用hexo写博客
新建一个文件夹,比如:myblog(名字任意),这个文件夹将来就作为你存放代码的地方,所以最好不要随便放。
初始化一个博客
1
2
3cd myblog/
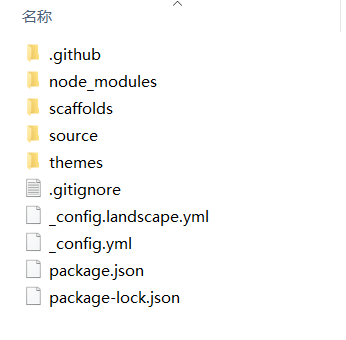
hexo init [myblog]
npm install # 安装依赖包hexo会自动下载一些文件到这个目录,包括node_modules,目录结构如下图:
本地预览
1
hexo s # 启动服务器
hexo s是开启本地预览服务,打开浏览器访问 http://localhost:4000 即可看到内容。
生成静态文件
1
$ hexo g # 生成静态文件
执行以上命令之后,hexo就会在public文件夹生成相关html文件,这些文件将来都是要提交到github去的。
运行测试
新建一个markdown ,用markdown进行编写
1
2
3
4hexo cl # 清除缓存文件 (db.json) 和已生成的静态文件 (public)。(cl = clean)
hexo s # 运行本地服务器
hexo g # 生成静态文件
hexo d # 部署网站。部署网站前,需要预先生成静态文件。
5. 将博客部署到GitHub上
在myblog文件夹里面执行下面语句,安装一个部署的插件
1
cnpm install --save hexo-deployer-git
配置
_config.yml中有关deploy的部分:1
2
3
4deploy:
type: git
repository: git@github.com:hinilzhang/hinilzhang.github.io.git
branch: master打开你的git bash,输入
hexo d就会将本次有改动的代码全部提交,没有改动的不会。常用的命令:
1
2
3
4
5hexo new "test" # 新建名为test的md文档
hexo clean # 用来清理缓存文件
hexo g # 生成文件
hexo s # 运行本地服务器
hexo d # 上传到服务器
6. 其他
保留CNAME、README.md等文件
提交之后网页上一看,发现以前其它代码都没了,此时不要慌,一些非md文件可以把他们放到source文件夹下,这里的所有文件都会原样复制(除了md文件)到public目录的。
由于hexo默认会把所有md文件都转换成html,包括README.md,所有需要每次生成之后、上传之前,手动将README.md复制到public目录,并删除README.html。
7. 备份
7.1. 原理
github上创建2个分支,例如:master、hexo(自己取)
master:存放博客静态文件(public文件夹下文件)
hexo:博客源文件(除了node_modules、public、db.json)
将源文件推送到hexo分支,博客部署通过
hexo d命令;后期换电脑设备,直接拉取hexo分支,配置一下hexo环境即可。
7.2. 更换电脑操作
安装git
git for windows/linux
配置git全局用户名邮箱
1
2git config --global user.name "github用户名"
git config --global user.email "github注册邮箱"配置SSH key
1
ssh-keygen -t rsa -C "邮件地址"
安装nodejs、npm
下载:https://nodejs.org/en/download/ (官网,建议选择LTS版本)
安装:一路next
安装hexo
1
2
3
4
5npm install hexo-cli -g
如果网络很慢,可以执行以下命令
npm install -g cnpm --registry=https://registry.npm.taobao.orgc
cnpm install hexo-cli -g克隆博客源文件
1
git clone [地址]
进入克隆的博客文件夹
1
cd xxx.github.io/
配置hexo
1
2
3
4安装依赖包
npm install
安装插件
npm install hexo-deployer-git --save # 自动部署插件编写博客
1
2
3
4
5
hexo n "postName" # hexo new 新建文章
hexo s # hexo server 开启预览访问端口(默认端口4000,'ctrl + c'关闭server)
hexo g # hexo generate 生成静态页面至public目录
hexo d # hexo deploy #将.deploy目录部署到GitHub
hexo clean备份博客原文件
1
git push
8. 无脑操作步骤
1 | ##### 安装 hexo ###### |
9. Hexo命令
1 | hexo new "postName" # 新建文章 |
10. Hexo新建文章头部示例
1 | --- |